Gaurav Learns a Thing

A blog for exploring things through code

Building a Webserver: Part 2 - HTTP

This is part of an ongoing series where we build a webserver from “scratch” for a certain definition of scratch. The primitives we are using are tcp libraries to handle network communication and threading libraries in python to handle concurrent connections.

In the previous post, we practiced TCP communication, sending basic messages using netcat and the socket library in python. This post, we’ll upgrade from basic text messages to messages that conform to the protocol defined by HTTP.

HTTP Requests

To keep our webserver simple, we’re just going to focus on the most basic communication model of requests and responses. We’re writing the server so we need to be able to understand requests and form responses. We’ll start with understanding requests.

The easiest way I could think to visualize what an HTTP request looks like was to just start sending HTTP requests to our program from the last post and print out what we see. Here’s what our test server looks like.

1
2
3
4
5
6
7
8
9
10
11
12
13
14
15
16
17
18
import socket

# Set up the server connection to listen on port 80. 
serversocket = socket.socket(socket.AF_INET, socket.SOCK_STREAM)
serversocket.bind(('0.0.0.0', 8080))

# The 1 means it can only handle 1 request at a time and will reject any connection if it's busy
serversocket.listen(1)

while True:
    # This call will block until someone tries to connect to port 8080
    (clientsocket, address) = serversocket.accept()

    msg = clientsocket.recv(256) # Read a max of 256 bytes
    # Just print out whatever a client sends us
    print(msg)
    print("----------")
    clientsocket.close()

Now instead of connecting via netcat and sending text messages, we’ll use curl which sends http requests. In the next gif, I use curl to send a couple different types of requests. If any of the curl options don’t make sense, you can look up the options on the man page
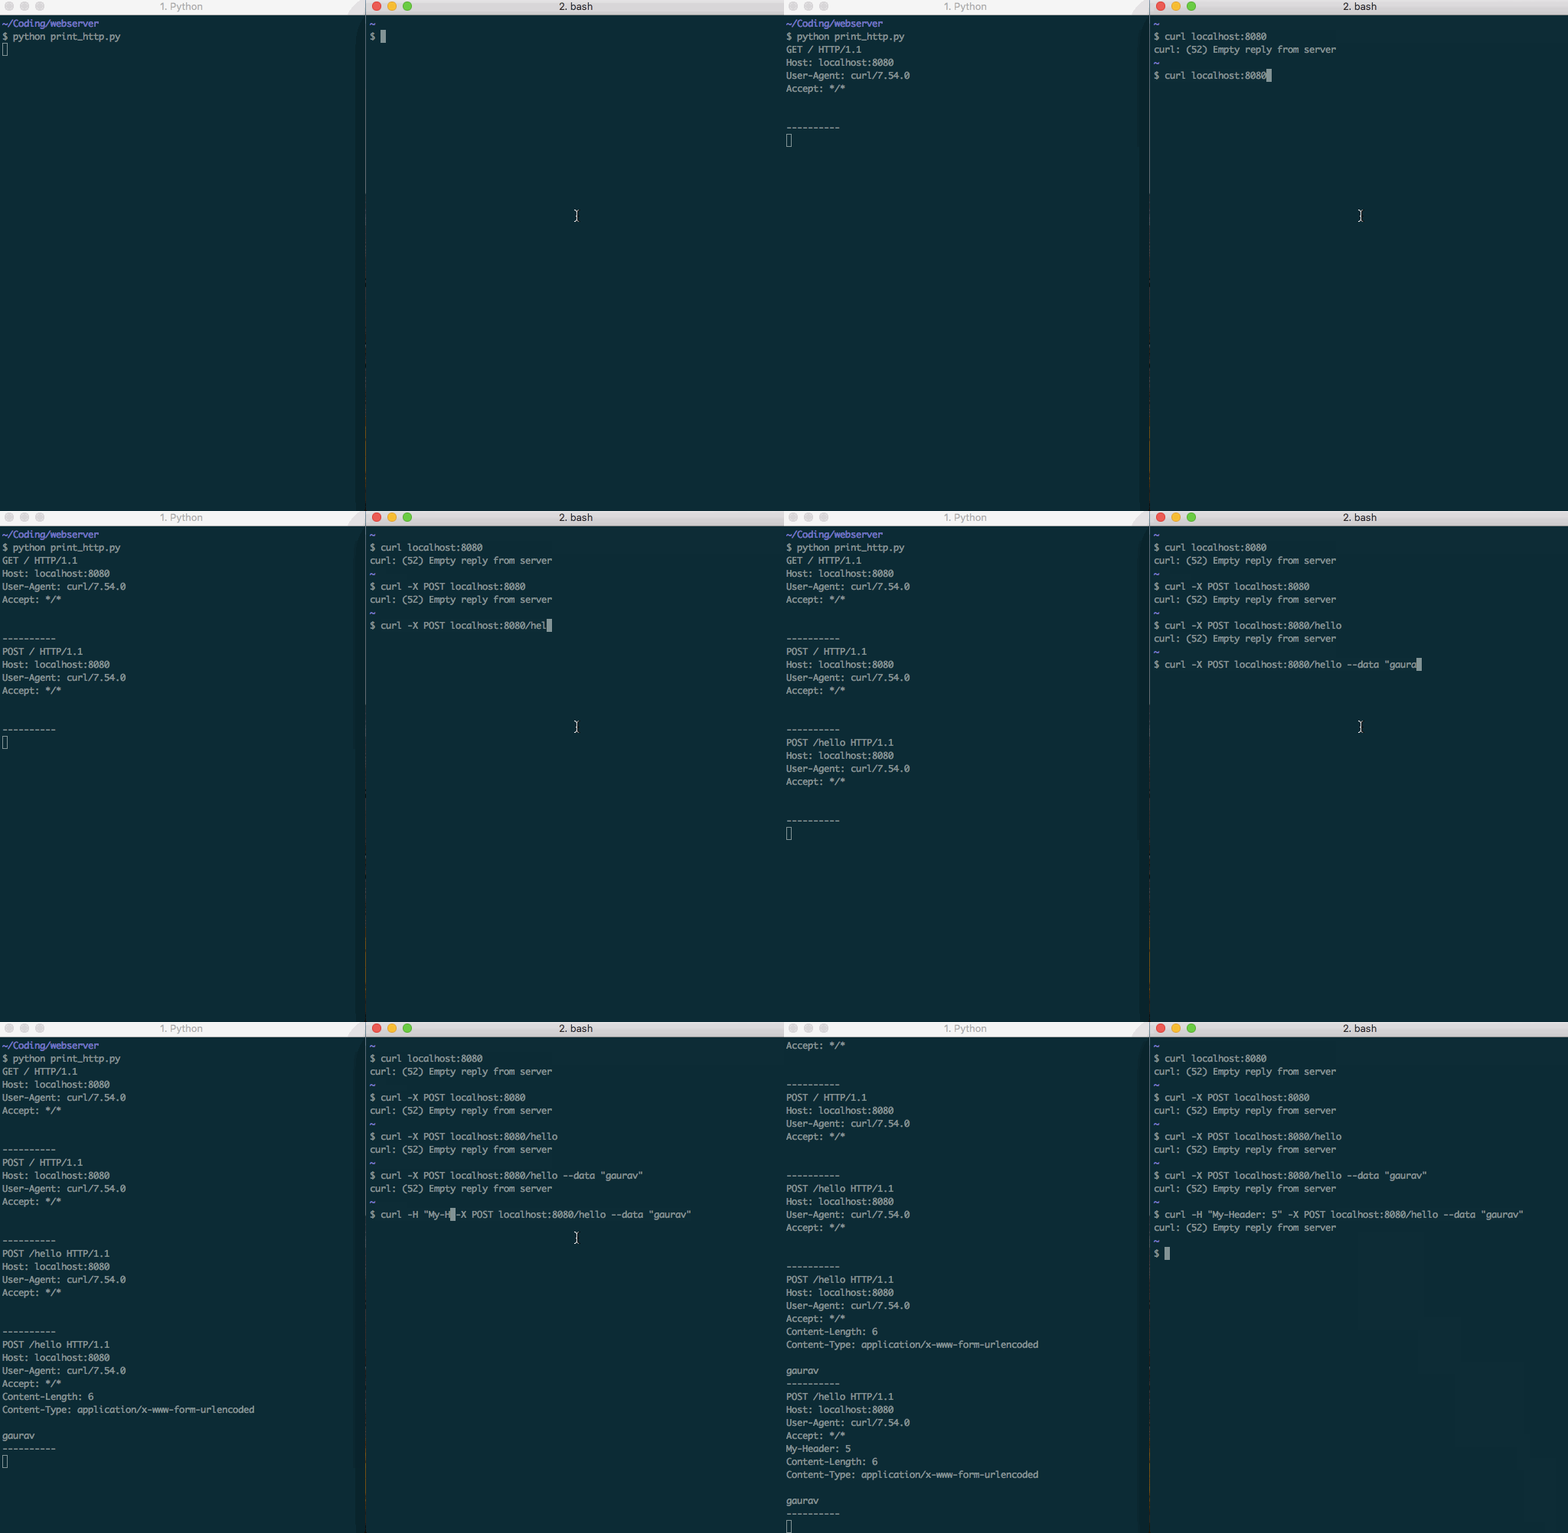
alt text

Curl is one way to send http requests but most likely, people will be using a web browser to make requests to my server. I was curious what request Google Chrome would make:
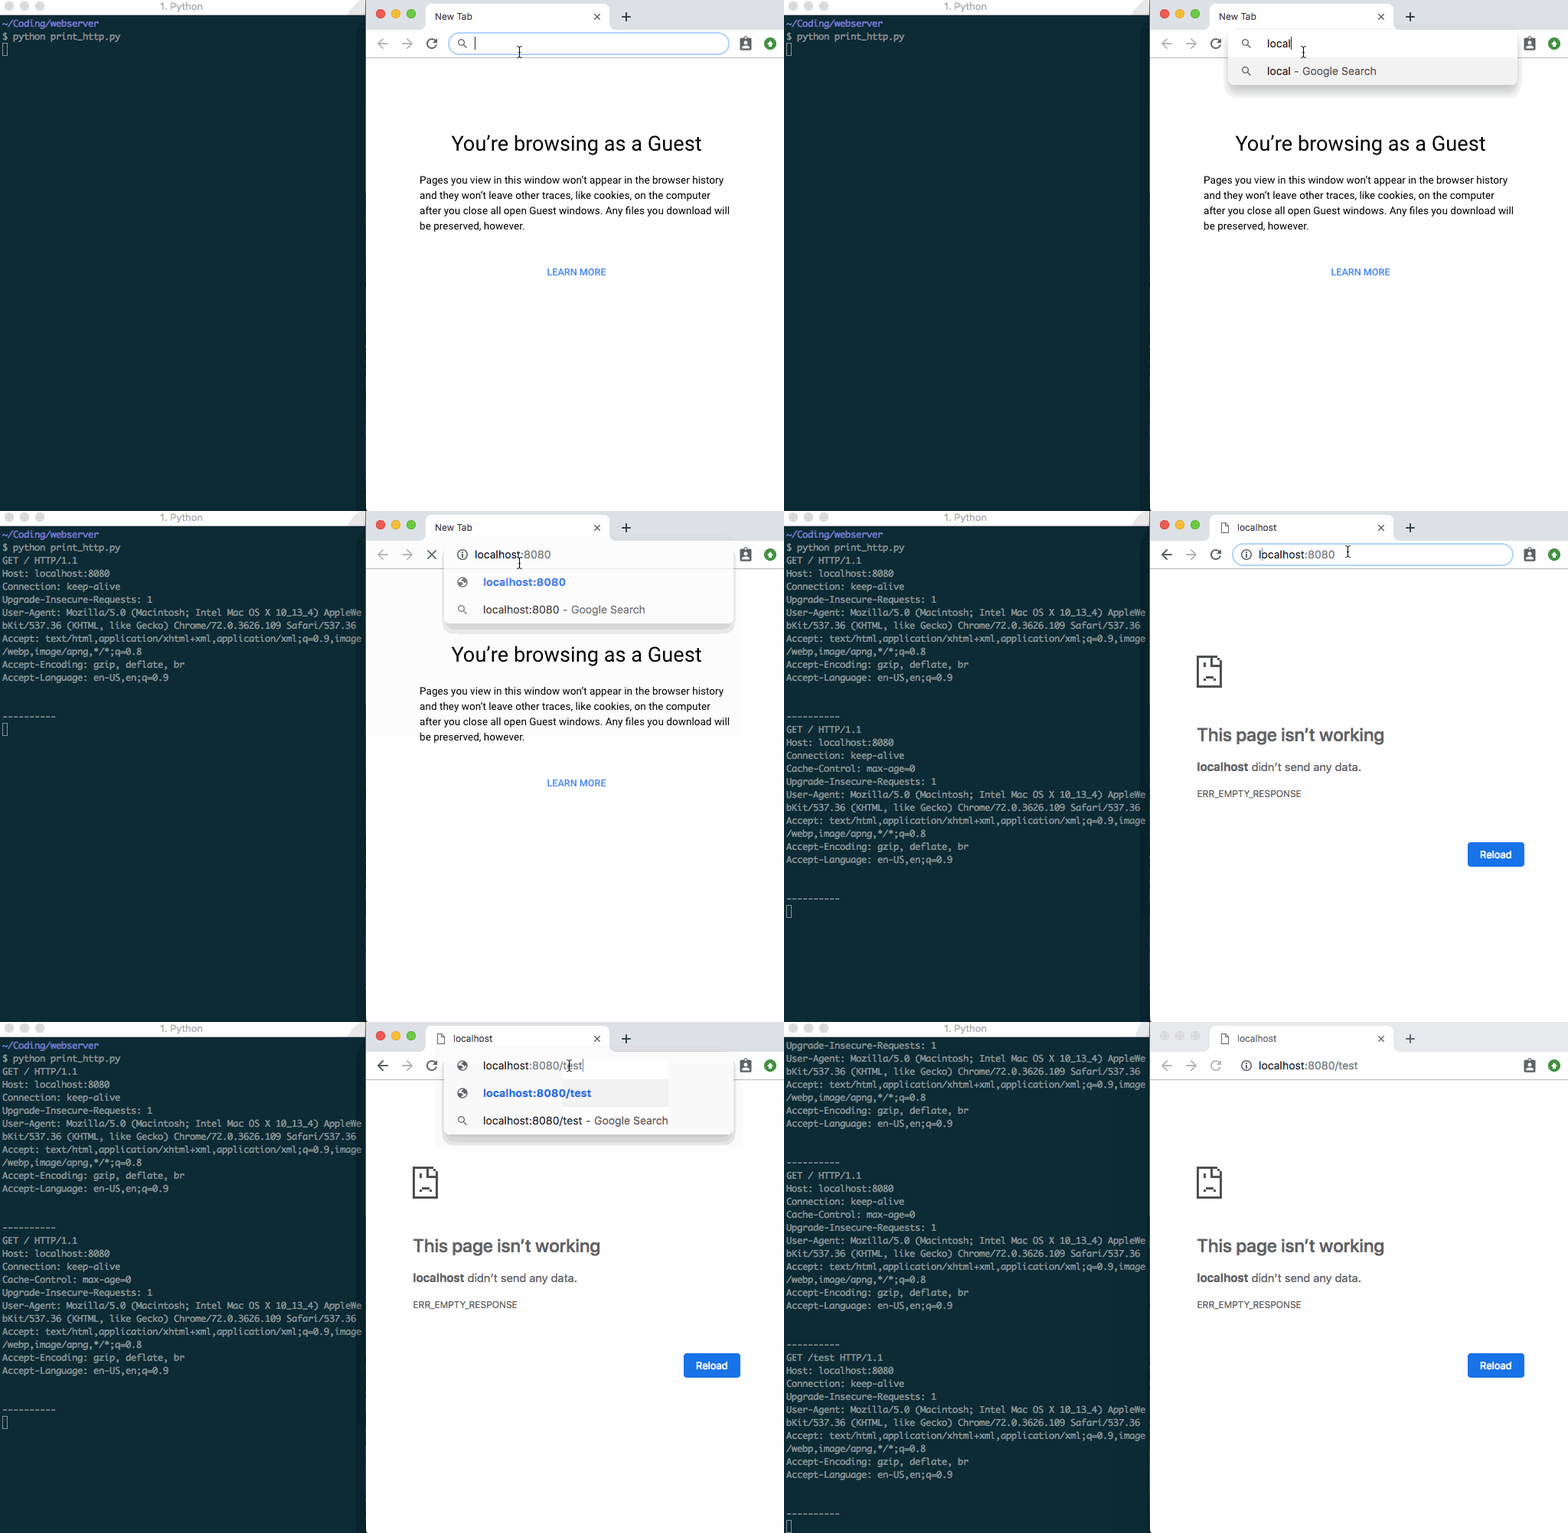
alt text

It looks really similar, there’s just more going on. I’m going to take one of the incoming requests we got and try and parse what’s going on.

1
$ curl -H "My-Header: 5" -X POST localhost:8080/hello --data "gaurav"

yielded

1
2
3
4
5
6
7
8
9
POST /hello HTTP/1.1
Host: localhost:8080
User-Agent: curl/7.54.0
Accept: */*
My-Header: 5
Content-Length: 6
Content-Type: application/x-www-form-urlencoded

gaurav

So first off, we’ve got a couple sections: The start-line (aka POST /hello HTTP/1.1), The Header block and the Body. The formal specification for the format of an HTTP message can be found in RFC 2616

Both [requests and responses] consist of a start-line, zero or more header fields (also known as “headers”), an empty line (i.e., a line with nothing preceding the CRLF) indicating the end of the header fields, and possibly a message-body.

And that’s exactly what we see above. The start-line aka Request-Line can be further broken down into three parts: POST, /hello and HTTP/1.1. Again from RFC 2616:

The Request-Line begins with a method token, followed by the Request-URI and the protocol version, and ending with CRLF. The elements are separated by SP characters.

Parsing an HTTP Request

Given what we know, we can create a data structure to store the HTTP Request. A really scrappy class to store an HTTP request:

1
2
3
4
5
6
7
8
9
10
11
12
13
14
15
16
17
18
19
20
21
22
23
class HTTPRequest:
    def from_str(cls, request_text):
        req = cls()
        request_text = request_text.decode()
        rest, body = request_text.split("\r\n\r\n")
        lines = rest.splitlines()

        request_line = lines[0]
        headers_list = lines[1:]
        method, uri, version = request_line.split(" ")

        # Turn headers into a dict
        headers = {}
        for header_str in headers_list:
            key, value = header_str.split(": ")
            headers[key] = value

        req.method = method
        req.uri = uri
        req.version = version
        req.headers = headers
        req.body = body
        return req

And if we update our code to parse the incoming message now, we get something like:

1
2
3
4
5
6
7
8
9
10
11
12
13
14
while True:
    # This call will block until someone tries to connect to port 8080
    (clientsocket, address) = serversocket.accept()

    msg = clientsocket.recv(8192) # Read a max of 8KB
    req = HTTPRequest.from_str(msg)

    print "{} made a {} request to {}".format(
        req.headers['User-Agent'],
        req.method,
        req.uri)

    # Close the connection
    clientsocket.close()

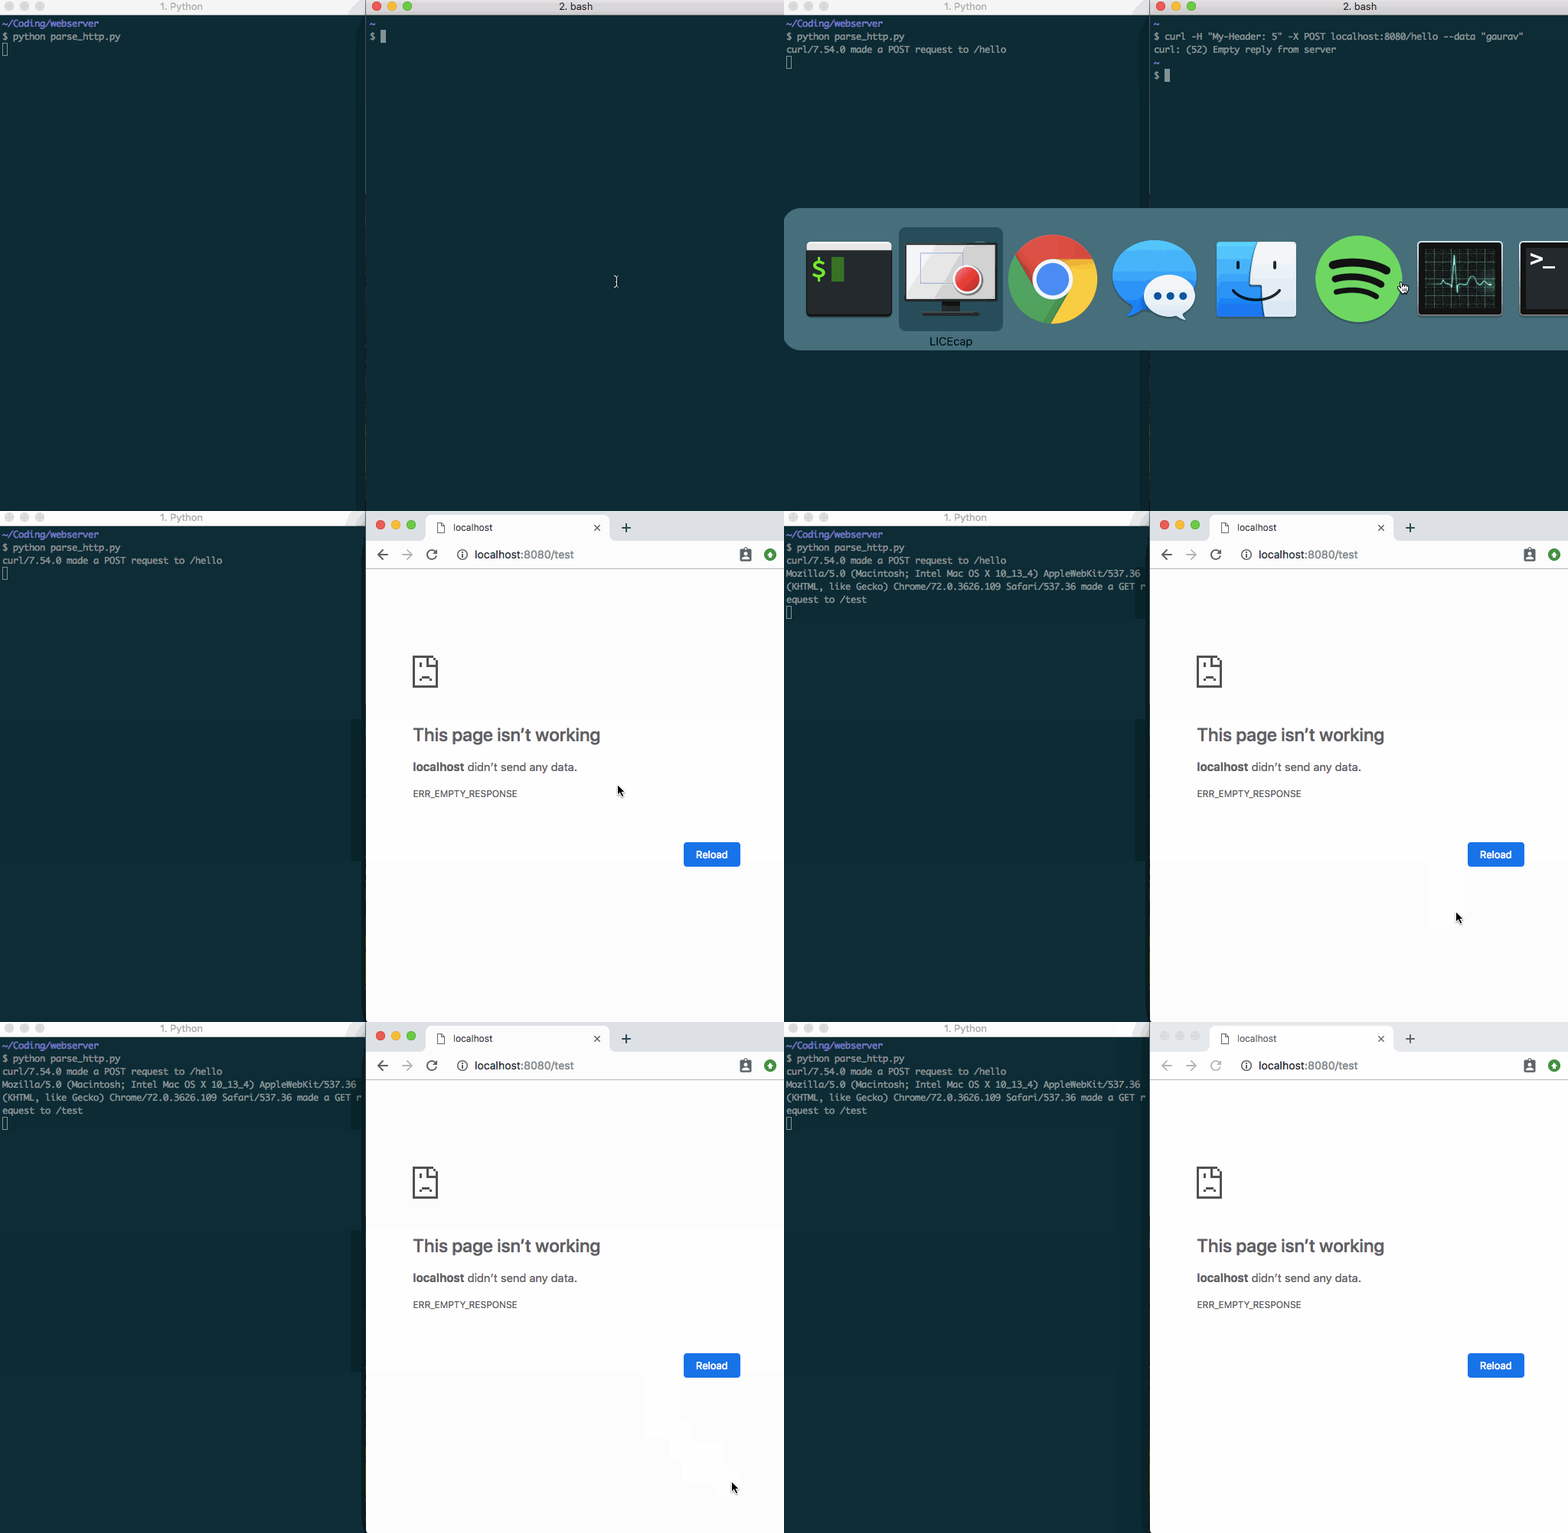
Trying it out:

alt text

Which will serve us just fine.

HTTP Response

On the flip side, we’re going to need to form an HTTP response. The web browser right now just errors when we close the connection. Again, we’ll take the approach of seeing the raw response from an actual server. One way to do that would be using netcat:

1
2
3
4
5
6
7
8
9
10
11
12
13
14
15
$ echo -n -e "GET /200 HTTP/1.0\r\nHost: httpstat.us\r\n\r\n" | nc httpstat.us 80
HTTP/1.1 200 OK
Cache-Control: private
Content-Length: 6
Content-Type: text/plain; charset=utf-8
Server: Microsoft-IIS/10.0
X-AspNetMvc-Version: 5.1
Access-Control-Allow-Origin: *
X-AspNet-Version: 4.0.30319
X-Powered-By: ASP.NET
Set-Cookie: ARRAffinity=beec3692495883b8df6195e900c12f49514e054d865a22ad2951c84f51dbaf93;Path=/;HttpOnly;Domain=httpstat.us
Date: Sun, 10 Mar 2019 19:45:59 GMT
Connection: close

200 OK

Note: the echo line above is manually constructing an HTTP request that looks like:

1
2
GET /200 HTTP/1.0
Host: httpstat.us

The response that came back from running that command looks a lot like the HTTP request. It’s got a “Status-Line” that mirrors the “Request-Line”. It also has a header block and a body. This makes parsing it really similar to parsing an HTTP request.

Refactoring our earlier code to support both requests and responses as well as both parsing and constructing http messages, we get something like this:

1
2
3
4
5
6
7
8
9
10
11
12
13
14
15
16
17
18
19
20
21
22
23
24
25
26
27
28
29
30
31
32
33
34
35
36
37
38
39
40
41
42
43
44
45
46
47
48
49
50
51
52
53
54
55
class HTTPMessage:
    @classmethod
    def from_str(cls, request_text):
        message = cls()
        request_text = request_text.decode()
        rest, body = request_text.split("\r\n\r\n")

        lines = rest.splitlines()
        start_line = lines[0]
        headers_list = lines[1:]

        # Turn headers into a dict
        headers = {}
        for header_str in headers_list:
            key, value = header_str.split(": ")
            headers[key] = value

        message.start_line = start_line
        message.headers = headers
        message.body = body

        return message


    def to_str(self):
        msg = "{}\r\n".format(self.start_line)
        for k, v in self.headers.items():
            msg += "{}: {}\r\n".format(k, v)
        msg += "\r\n{}".format(self.body)
        return msg.encode()


class HTTPRequest(HTTPMessage):
    @classmethod
    def from_str(cls, request_text):
        req = super().from_str(request_text)
        req.method, req.uri, req.version = req.start_line.split(" ")
        return req


    def to_str(self):
        self.start_line = "{} {} {}".format(self.method, self.uri, self.version)
        return super().to_str()


class HTTPResponse(HTTPMessage):
    @classmethod
    def from_str(cls, resp_text):
        req = super().from_str(request_text)
        req.version, req.status, req.message = req.start_line.split(" ")
        return req

    def to_str(self):
        self.start_line = "{} {} {}".format(self.version, self.status, self.message)
        return super().to_str()

Where the implementation difference between HTTPRequests and HTTPResponses is just in the start_line which matches what we saw above.

Putting it all together

We’ve got everything we need to do a really basic server. It’s going to simply spit back out the URL that was requested with a 200 status code.

1
2
3
4
5
6
7
8
9
10
11
12
13
14
15
16
17
while True:
    # This call will block until someone tries to connect to port 8080
    (clientsocket, address) = serversocket.accept()

    msg = clientsocket.recv(8192) # Read a max of 8KB
    req = HTTPRequest.from_str(msg)
    res = HTTPResponse()

    res.version = req.version
    res.status = 200
    res.message = "OK"
    res.body = req.uri
    res.headers = {}

    clientsocket.send(res.to_str())
    # Close the connection
    clientsocket.close()

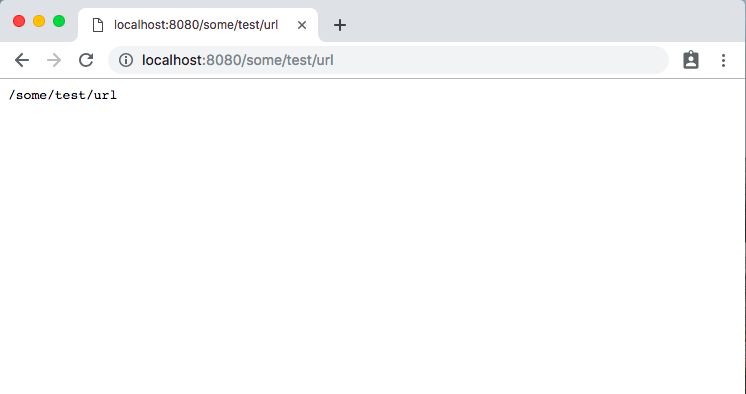
And indeed, Google Chrome knows how to understand the response it gets back:
alt text

Wrapping Up

In this post, we saw what raw HTTP requests and responses look like and threw together some code to serialize and deserialize these HTTP messages. While it doesn’t do any fancy routing, and any necessary response headers have to be set explicitly (for instance, if we were returning a JSON response and wanted to tell the client about the Content-Type), we could do all of those things by hand with the pieces that we have.

Before moving on, try messing with some of this stuff on your own. An easy way to jump in is to take this command from above:

1
$ echo -n -e "GET /200 HTTP/1.0\r\nHost: httpstat.us\r\n\r\n" | nc httpstat.us 80

and modify it. For instance, try sending an Accept header with the value application/json, and see if the server responds with an appropriate Content-Type header

One glaring problem with our web server so far is that it can only handle one request at a time. If a request comes in while this code is in the while loop above, that request just has to wait for the next iteration of the loop. This is no good, we want to be able to support concurrent requests otherwise our webserver would fall apart pretty quickly under any reasonable amount of load. In the next post we’ll look at some basic strategies for supporting concurrent requests.
Building a Webserver: Part 1 - TCP Communication

I was watching a really great talk that Julia Evans gave about learning new things. One suggestion was to build projects like a TCP stack, or a keyboard driver. The point isn’t for it to be great but rather to learn something by diving into the guts of something. It sounded like it could be fun so I decided to dig one level deeper into something I depend on all the time: HTTP servers. Through this series, I will be putting together a basic web server using the primitives of TCP and threading. We’ll explore how to form HTTP requests and responses as well as different strategies that a server can use to handle many concurrent requests.

What I know before I start

I’m starting this project with a high level understanding of how webservers work. That TCP is a way computers talk to each other over networks. I know that webservers use a couple different strategies for handling multiple requests concurrently. They can use threading, spawning a new thread per request. There’s also some strategy that involves event loops. I’m hazy on the exact details though, but we’ll learn soon enough!

What I’ll be building

I’m going to create a pretty basic calculator web server. It’s going to respond to GET requests that look like /add/2/3 and return 5 in the body. It will also support a /calc json api which takes a request body that looks something like:

1
2
3
4
5
{
  op: 'mult',
  arg1: 2,
  arg2: 4
}

Most importantly, it will not be done using any webserver frameworks. I can only read and write bytes from open sockets and I must implement support for concurrency by hand. Let’s get started.

Step 1 - TCP Communication

The very first thing to get comfortable with is talking TCP. TCP is a protocol for sending messages between a source and a destination and for this project, that’s really all we need to know. This all feels a little abstract though; let’s see TCP messages in action. The easiest way I’ve found to do this is to use a program called netcat. You can check if you have netcat installed by running nc.

The simplest demo of what you can do in netcat is to open a terminal with two tabs. In one run

1
$ nc -l 1234

Which will just sit there and wait. -l means “run netcat in listen mode” and 1234 is the port it’s listening to. Basically, it’s just waiting for someone to connect to that port and send some messages.

So let’s connect to that port. In a separate tab run

1
$ nc -v localhost 1234

-v means “run in verbose mode”. For learning purposes we’re just gonna run everything always in verbose more. You should see something like:

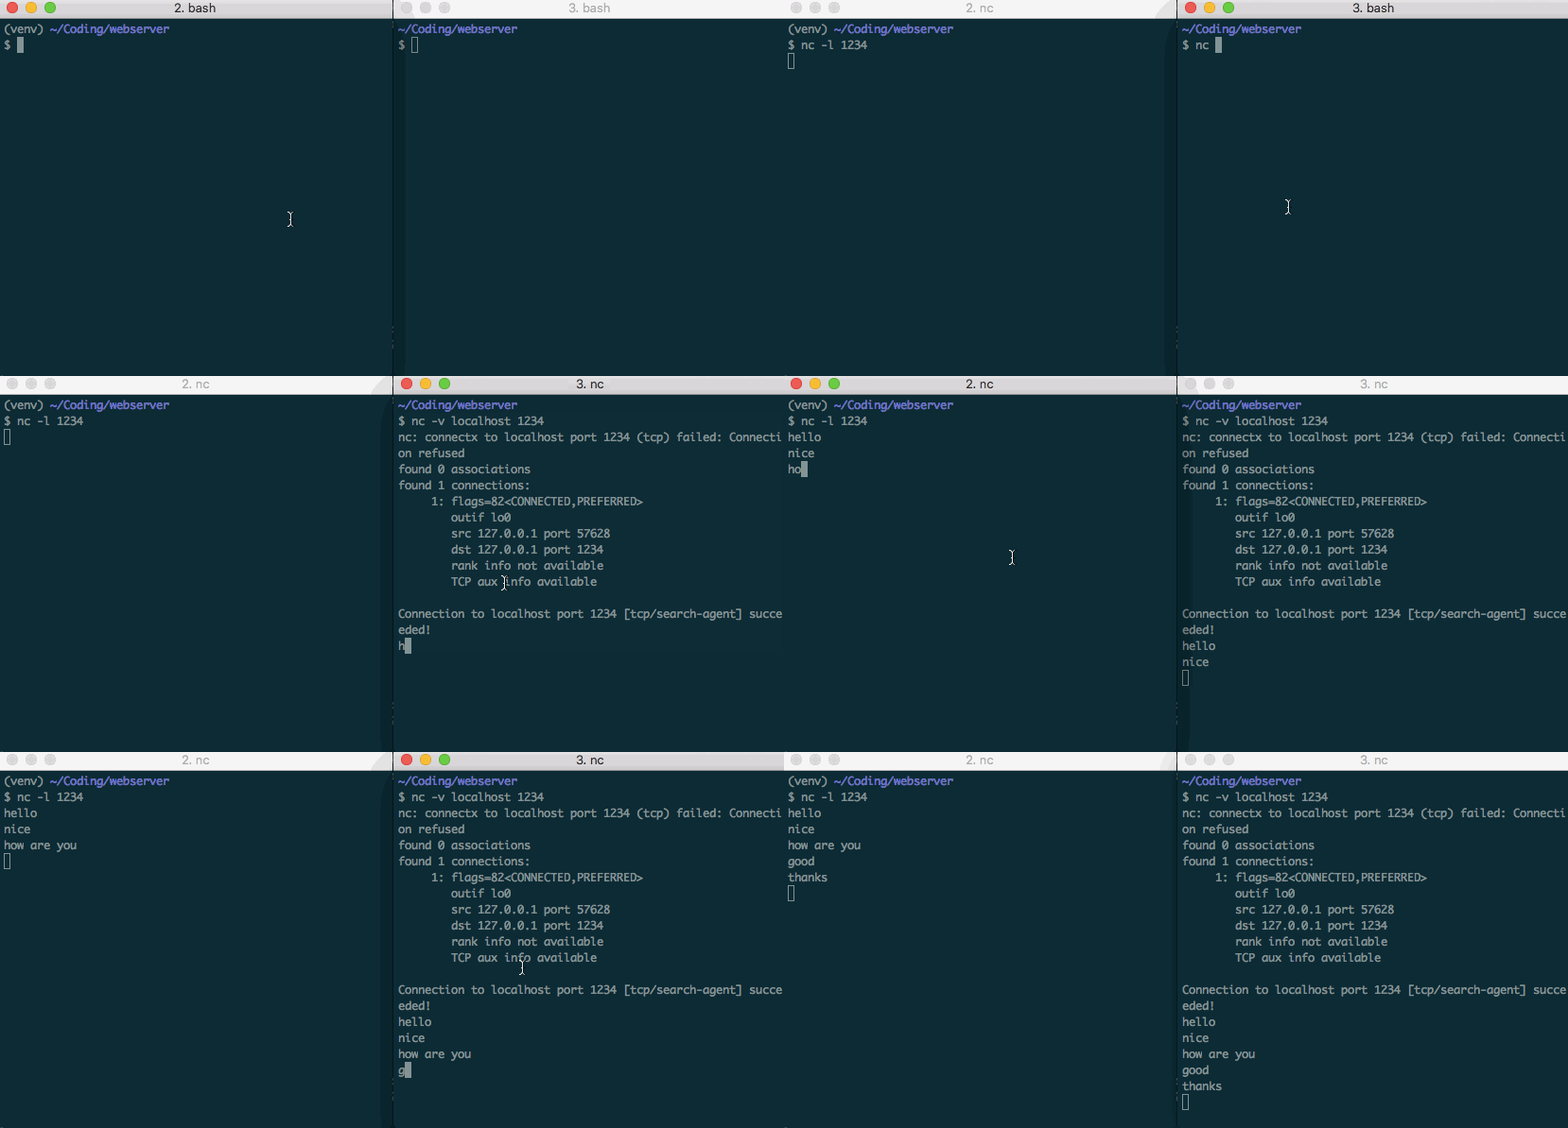
At this point you should be able to send a message from one of the tabs and see it echoed in the second. You can see a demo here:

alt text

Open up your terminal and try it yourself. These messages are going to be the building blocks of our web server. Everything we do from here on out is going to be sending messages just like this, just programatically generated and with the messages specially formatted to conform to the HTTP spec.

TCP Communication in Python

I’ll be doing this whole project in python. Note: I’m working in python 3.7.2. Let’s look at the code to send and receive TCP messages.

1
2
3
4
5
6
7
8
9
10
11
12
13
import socket

# Set up the server connection to listen on port 80. 
serversocket = socket.socket(socket.AF_INET, socket.SOCK_STREAM)
serversocket.bind(('0.0.0.0', 8080))

# The 1 means it can only handle 1 request at a time and will reject any connection if it's busy
serversocket.listen(1)

# This call will block until someone tries to connect to port 8080
(clientsocket, address) = serversocket.accept()

print(address)

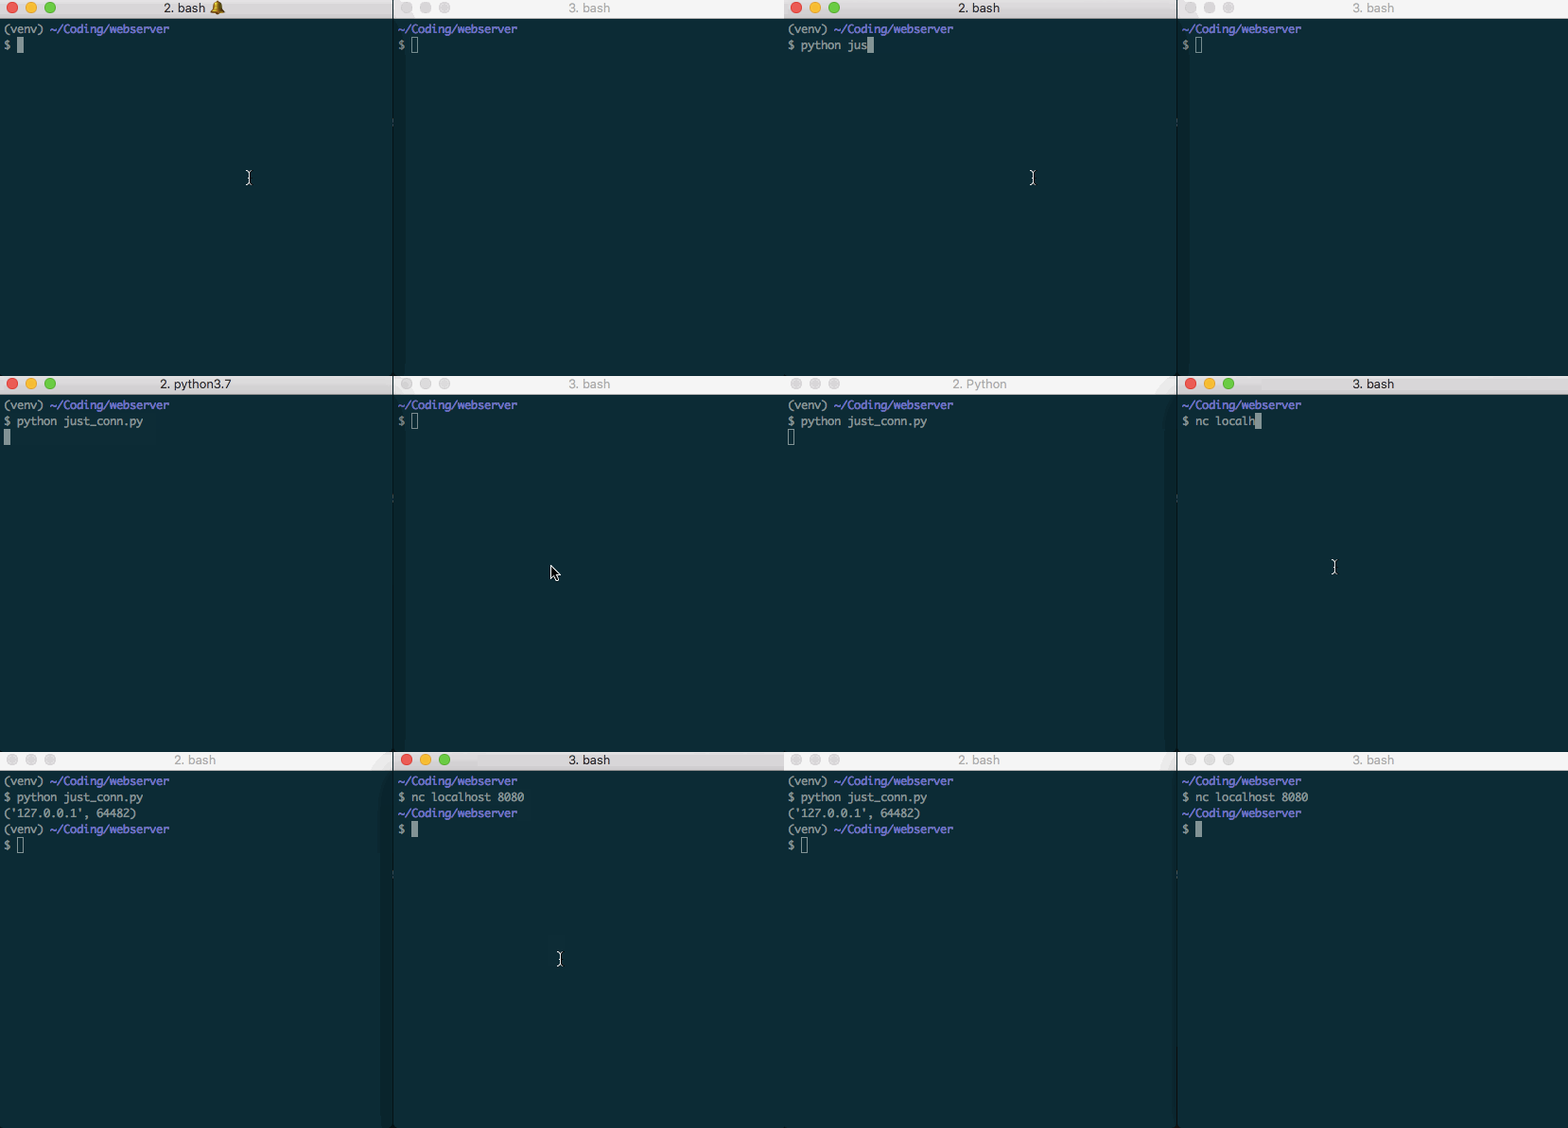
This is just going to accept connections and print out who is connecting. Let’s give it a try.

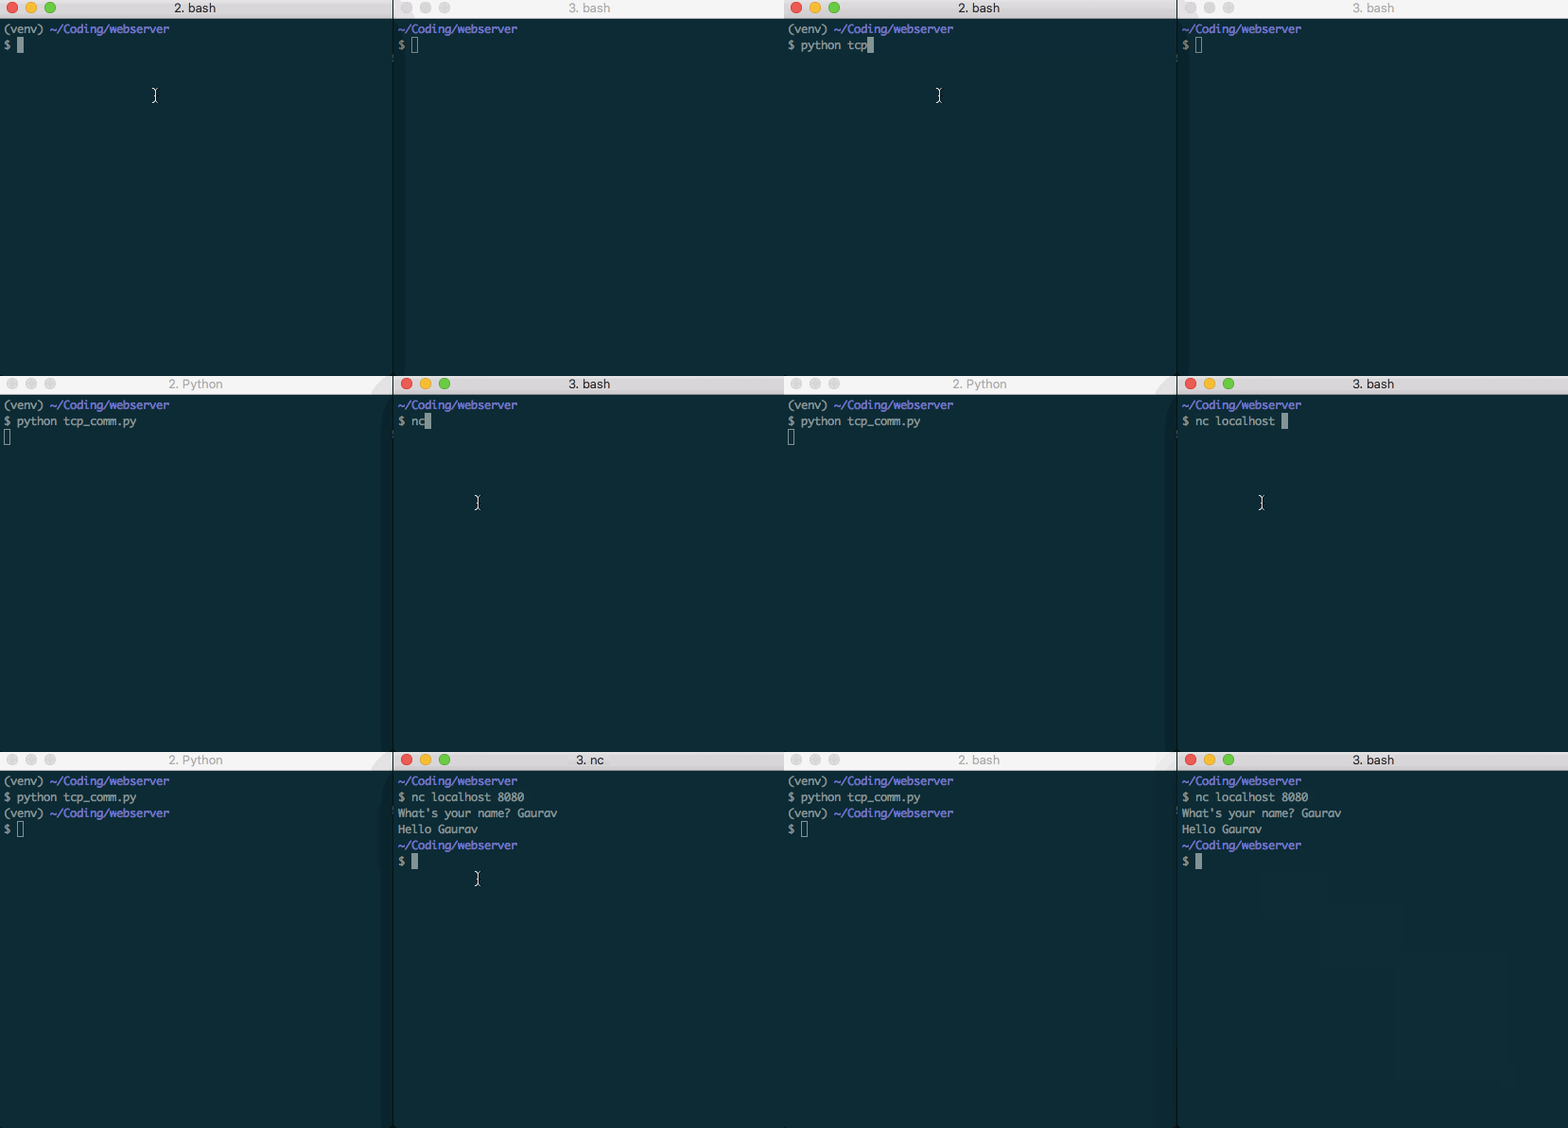
alt text

That’s a start! Now instead of just establishing a connection and printing the connection information, let’s actually send and receive messages. For this example, we’re going to ask for a name, receive the name and then greet the connector.

1
2
3
4
5
6
7
8
9
10
11
12
13
14
15
16
import socket

# Set up the server connection to listen on port 80. 
serversocket = socket.socket(socket.AF_INET, socket.SOCK_STREAM)
serversocket.bind(('0.0.0.0', 8080))

# The 1 means it can only handle 1 request at a time and will reject any connection if it's busy
serversocket.listen(1)

# This call will block until someone tries to connect to port 8080
(clientsocket, address) = serversocket.accept()

# send and recv require byte-encoded strings
clientsocket.send(b'What\'s your name? ')
msg = clientsocket.recv(256) # Read a max of 256 bytes
clientsocket.send(b'Hello ' + msg)

And the result:

alt text

And with that we’ve got basics of sending and receiving message over TCP. We still want to talk HTTP instead of ASCII strings, keep the server alive after responding to a request and be able to handle many requests concurrently, but we’ll save all that for future posts.

Wrapping Up

In this post we went over the basics of TCP communication, looked at netcat and made a simple program to greet people over a network. In the next post, we’ll look at sending HTTP messages back and forth, instead of just ASCII text. Before jumping to that, play around with the concepts in this post. I only talked over localhost; try using netcat to talk between two different computers.